Azure Monitoring Requirements
Visit this post regularly to check for updates.
If you get to a point to monitor Microsoft Azure items, you can connect to Azure using a username and password with MFA exclusion, but you will also need an app registration to connect with. Why not go the additional extra step and also generate a certificate, so that you can use this certificate to authenticate to the tenant in Azure. Below you can find a detailed explanation how to setup this app including it’s certificate.
- Logon to https://portal.azure.com
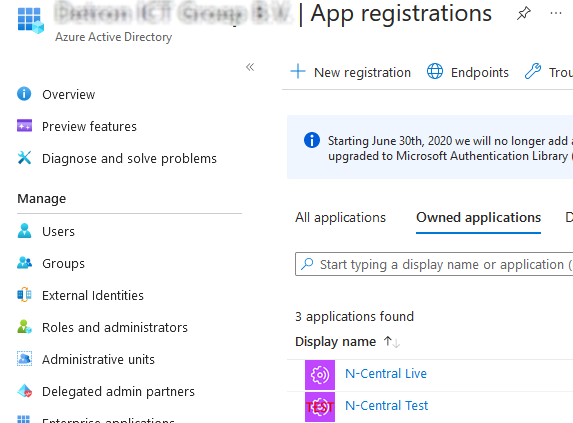
- Go to Microsoft Entra ID (formerly Azure Active Directory)
- Go to App Registrations
- Click on New Registration on the top of the screen
- Give the application a clear name. When you create the application for use with NCentral please always use the name NCentral Azure Monitoring. That way we always know why an application was registered.
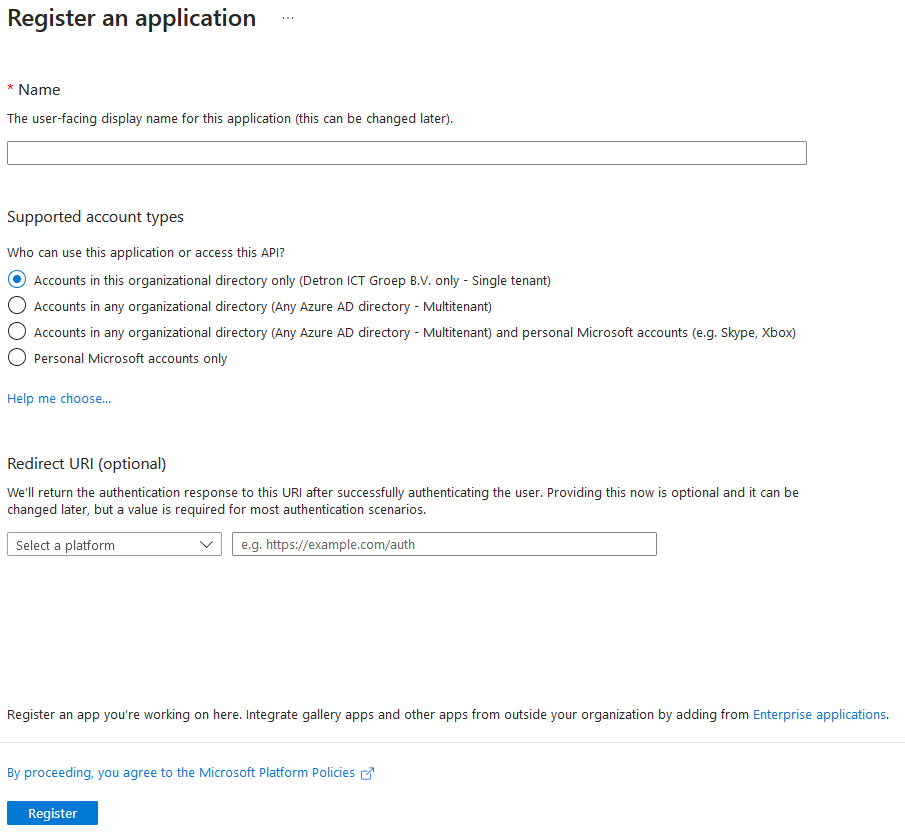 The rest of the form must be left as-is
 - The base app is now created.
 Unfortunatly, the app currently doesn’t have any permissions to do anything by default.
 - Go to API Permissions on the left side and click on Add Permission
- When adding the permissions, choose Microsoft Graph and then choose Application permissions
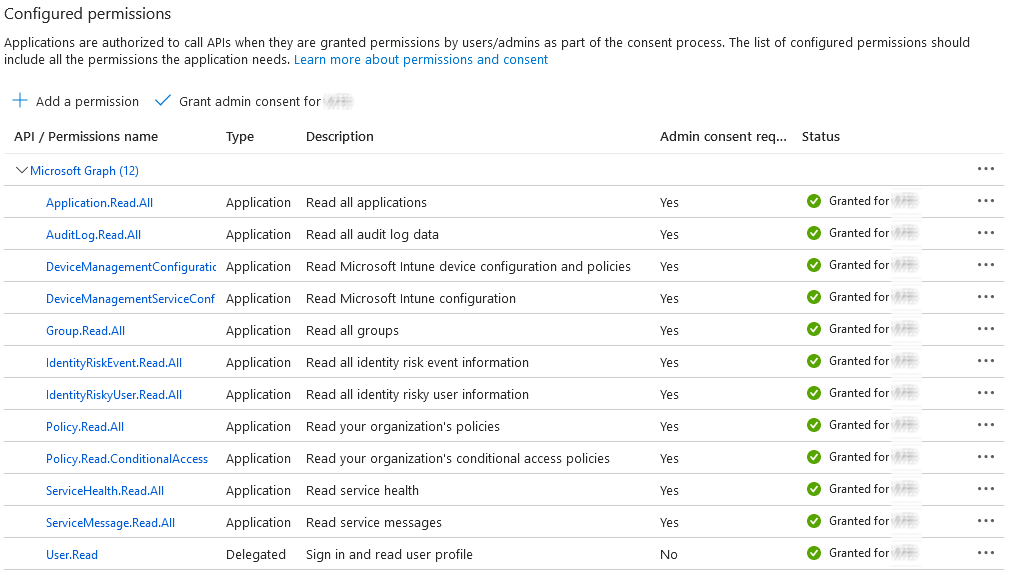
- Search for the listed API permissions below and add a checkmark next to it.
- Application.Read.All
- AuditLog.Read.All
- DeviceManagementConfiguration.Read.All
- DeviceManagementServiceConfig.Read.All
- Group.Read.All
- IdentityRiskEvent.Read.All
- IdentityRiskyUser.Read.All
- Policy.Read.ConditionalAccess
- Policy.Read.All
- ServiceHealth.Read.All
- ServiceMessage.Read.All
- Click on Add permissions at the bottom right
- Some tenants are locked down, so ask a global admin user for that tenant to grant the Admin Consent, or click the button yourself if you have the rights to do this.
- After the admin consent has been given, this screen should look like this:
- Now go to Certificates & secrets
- Open the computer that is going to monitor the Azure services.
- On the server open the services list.
- Check which user is set as Logon As for the service Automation Manager Agent

- Open Powershell on the computer that is going to monitor the specified services as the specified user above and execute the code below. If the user is listed as Local System (like the example above) then open Take Control, go to the System Shell tab and type powershell before executing the commands below:
1
2
3
$certname = "NCentral Azure Monitoring"
$cert = New-SelfSignedCertificate -Subject "CN=$certname" -CertStoreLocation "Cert:\CurrentUser\My" -KeyExportPolicy Exportable -KeySpec Signature -KeyLength 2048 -KeyAlgorithm RSA -HashAlgorithm SHA256
Export-Certificate -Cert $cert -FilePath "C:\Temp\$certname.cer"
- In the C:\Temp folder on the computer that you used to generate this certificate, is now a .cer-file with the name NCentral Azure Monitoring.cer present. Upload this file to the Certificates & Secrets in Azure.
- Go back to Microsoft Entra ID
- Choose Roles and administrators
- Search for the role Global Reader and click on the name
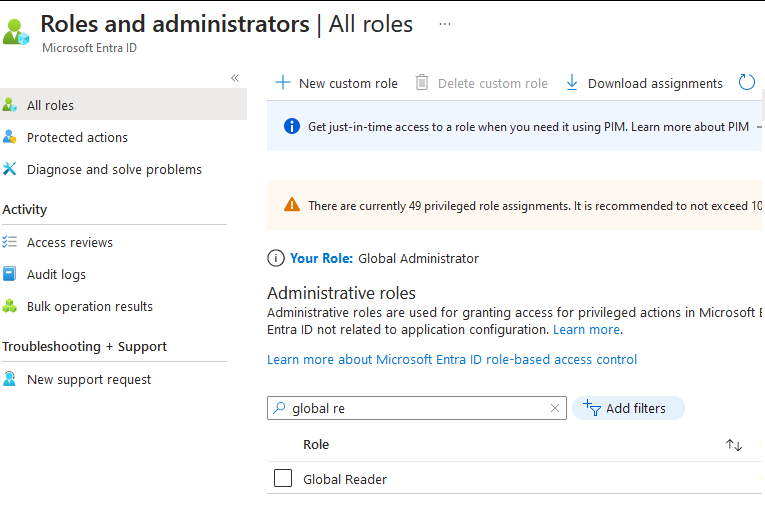
- Click on Add assignments

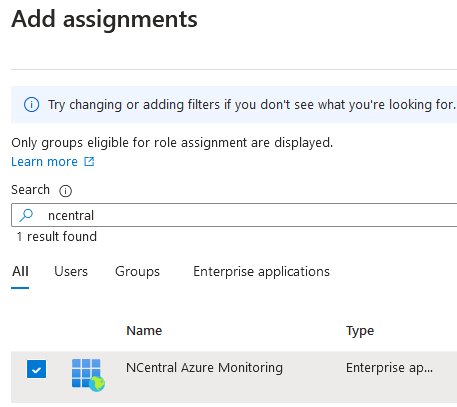
- Seach for NCentral Azure Monitoring, click the checkmark in front of it and click Add
- Go to NCentral and make sure you are at the Managed Services level.
- Search for the server that you are using to monitor the Azure services with, without going to customer or site level first:

- In the example above, you can see that the server we are going to use, resides at the customer level, because no Site has been specified in this example.
- In NCentral, now go to Administration > Customers (when the server resides at customer level) or go to the customer level and then go to Administration > Sites if the server resides at a site specific level.
- Edit the Customer (or Site) and go to the tab Custom Properties. Here you can find 3 empty properties:

- Fill these properties as following:
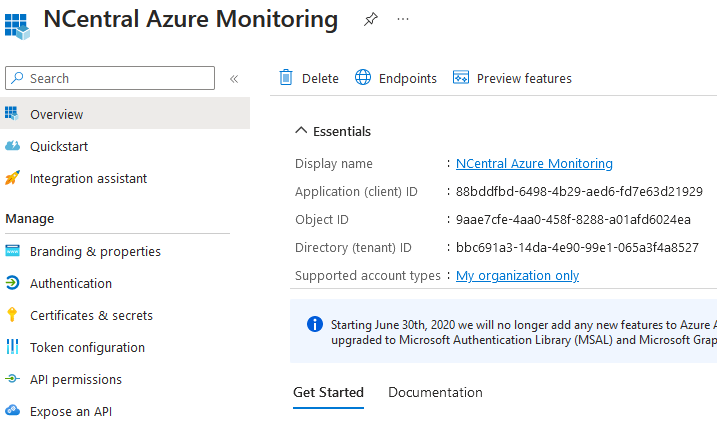
- Azure Certificate Thumbprint: Go back to Azure and select the application NCentral Azure Monitoring and go to the option Certificates & secrets. There you will find the thumbprint. Just double click it, to select the entire Thumbprint (even though it isn’t completely visible, it will select the entire thumbprint) and copy it. Next past it in the Azure Certificate Thumbprint property in NCentral.
- Azure Client ID: Go back to Azure and go to the tab Overview of the application NCentral Azure Monitoring. At the top you will find the Application (client) ID. Move the mouse over the Application (client) ID to make a copy button visible. Click the copy button and paste the value in the Azure Client ID field in NCentral.
- Azure Tenant ID: Go back to Azure and go to the tab Overview of the application NCentral Azure Monitoring. At the top you will find the Directory (tenant) ID. Move the mouse over the Directory (tenant) ID to make a copy button visible. Click the copy button and paste the value in the Azure Tenant ID field in NCentral.
- Hit Save at the bottom left to save the now filled custom properties
- Open an administrative powershell session.
- Execute the following commands to install all the required powershell modules:
1
2
[Net.ServicePointManager]::SecurityProtocol = [Net.SecurityProtocolType]::Tls12
Install-Module Microsoft.Graph.Authentication, Microsoft.Graph.Applications, Microsoft.Graph.Reports, Microsoft.Graph.Beta.Applications, Microsoft.Graph.Beta.Devicemanagement.Enrollment, Microsoft.Graph.Identity.SignIns, az.storage, AzureAD, Microsoft.Graph.Groups, Microsoft.Graph.DeviceManagement.Administration, Microsoft.Graph.Devices.CorporateManagement, Microsoft.Graph.Devices.ServiceAnnouncement
This post is licensed under CC BY 4.0 by the author.